Healthy Homemade Popsicles
Refreshing, protein-packed popsicle recipes from a dietitian private practice—customized nutrition plans for summer and endurance athletes.
Balanced snacks for endurance athletes, hormonal health and daily fueling!
I don’t know about you, but I don’t think it gets much better than eating a popsicle in the backyard on a hot summer afternoon or evening! And while I have nothing against store-bought popsicles, I love the idea of having a treat that’s both refreshing and nourishing. As a dietitian private practice focused on real-life balance and customized nutrition plans, I’m always looking for ways to make food fun, delicious, and supportive of your health goals.
These popsicles include a balance of protein and fat, which helps keep you satisfied longer and provides sustained energy — perfect for kids, busy adults, or anyone looking to fuel their day the smart way.

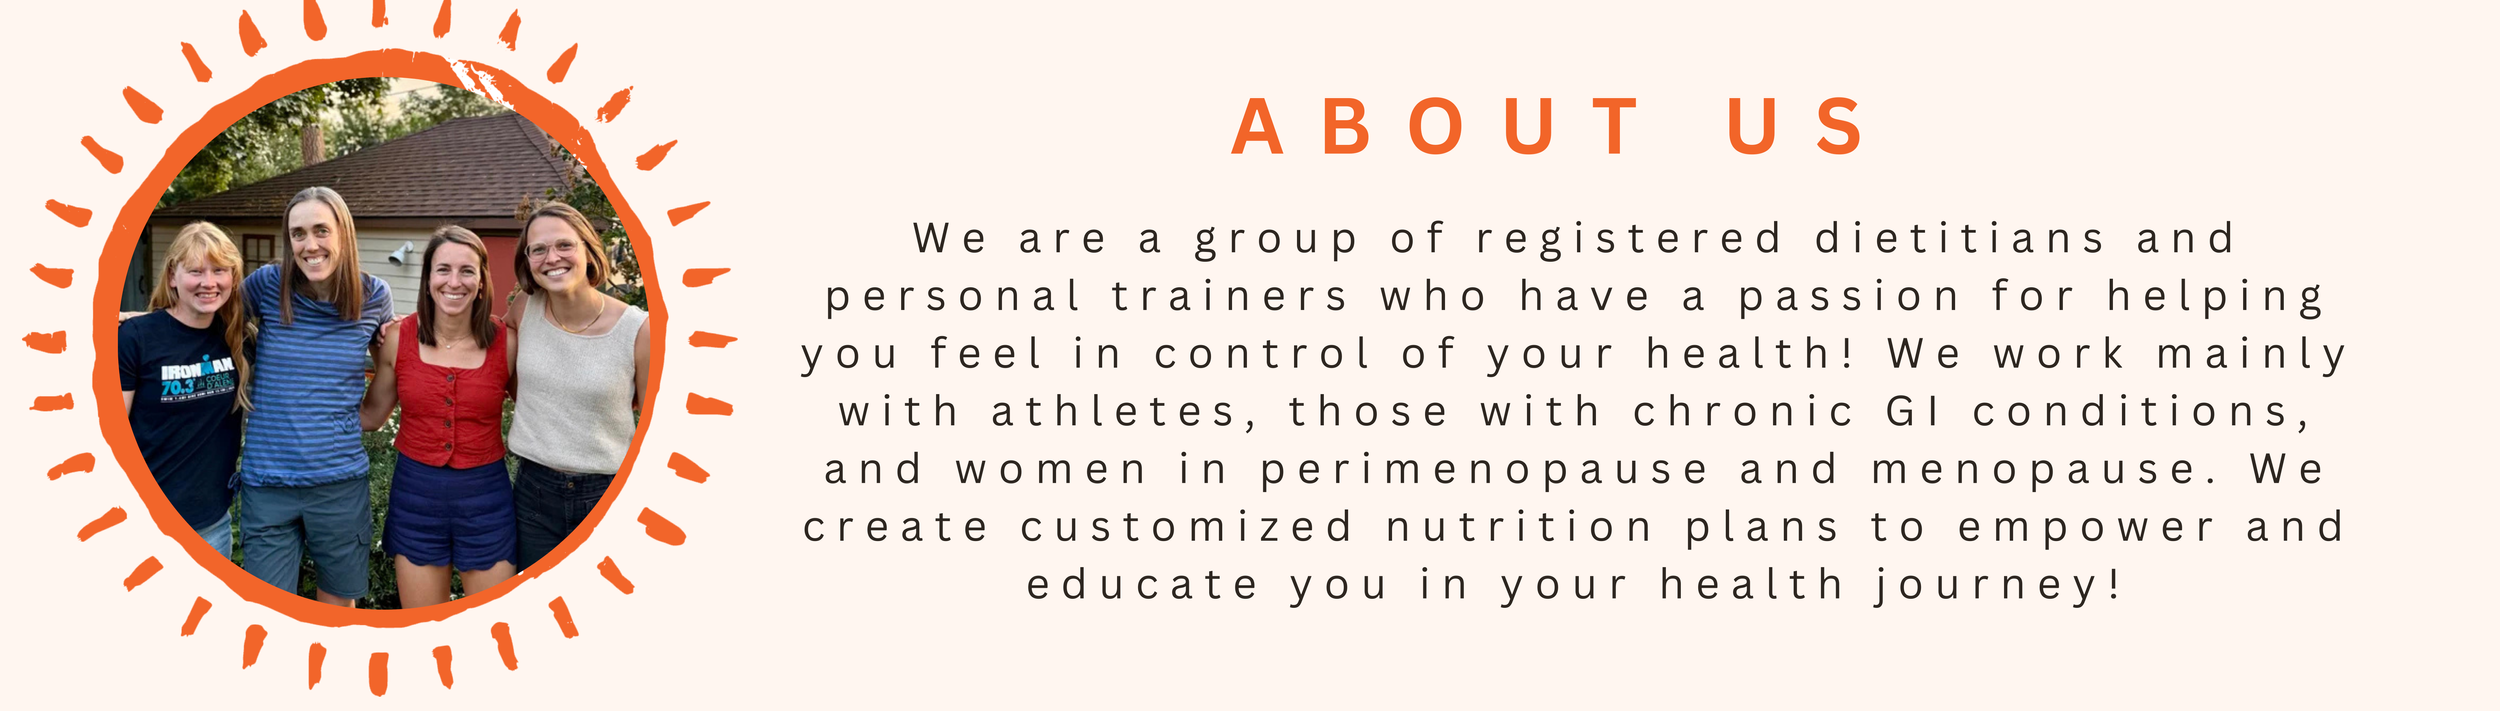
ABOUT US: SPOKANE NUTRITIONISTS
We are a group of registered Spokane dietitians and personal trainers who have a passion for helping you feel in control of your health.
We work mainly with athletes, those with chronic GI conditions, and women in perimenopause and menopause. We create customized nutrition plans to empower and educate you in your health journey.
Why Add Protein and Fat to Popsicles?
Including ingredients like Greek yogurt or milk adds a creamy texture and helps stabilize blood sugar levels — an important part of the nutrition guidance I emphasize in our customized nutrition plans. These simple additions make your popsicles not just a sweet treat, but a balanced snack that fits into a healthy lifestyle.
If you’re an active individual or part of our community interested in nutrition for endurance athletes, these recipes can also serve as a recovery snack after long runs, bike rides, or workouts. The combination of carbohydrates and protein supports muscle recovery and replenishes energy stores.
What You’ll Need
If you’re making popsicles at home, it’s helpful to have a popsicle tray. I have one similar to this and absolutely love it! You can also get creative with your ingredients — swap in your favorite fruits, juices, or dairy alternatives to make them your own.
Also, it is helpful to have a popsicle tray. I have one similar to this and I love it!
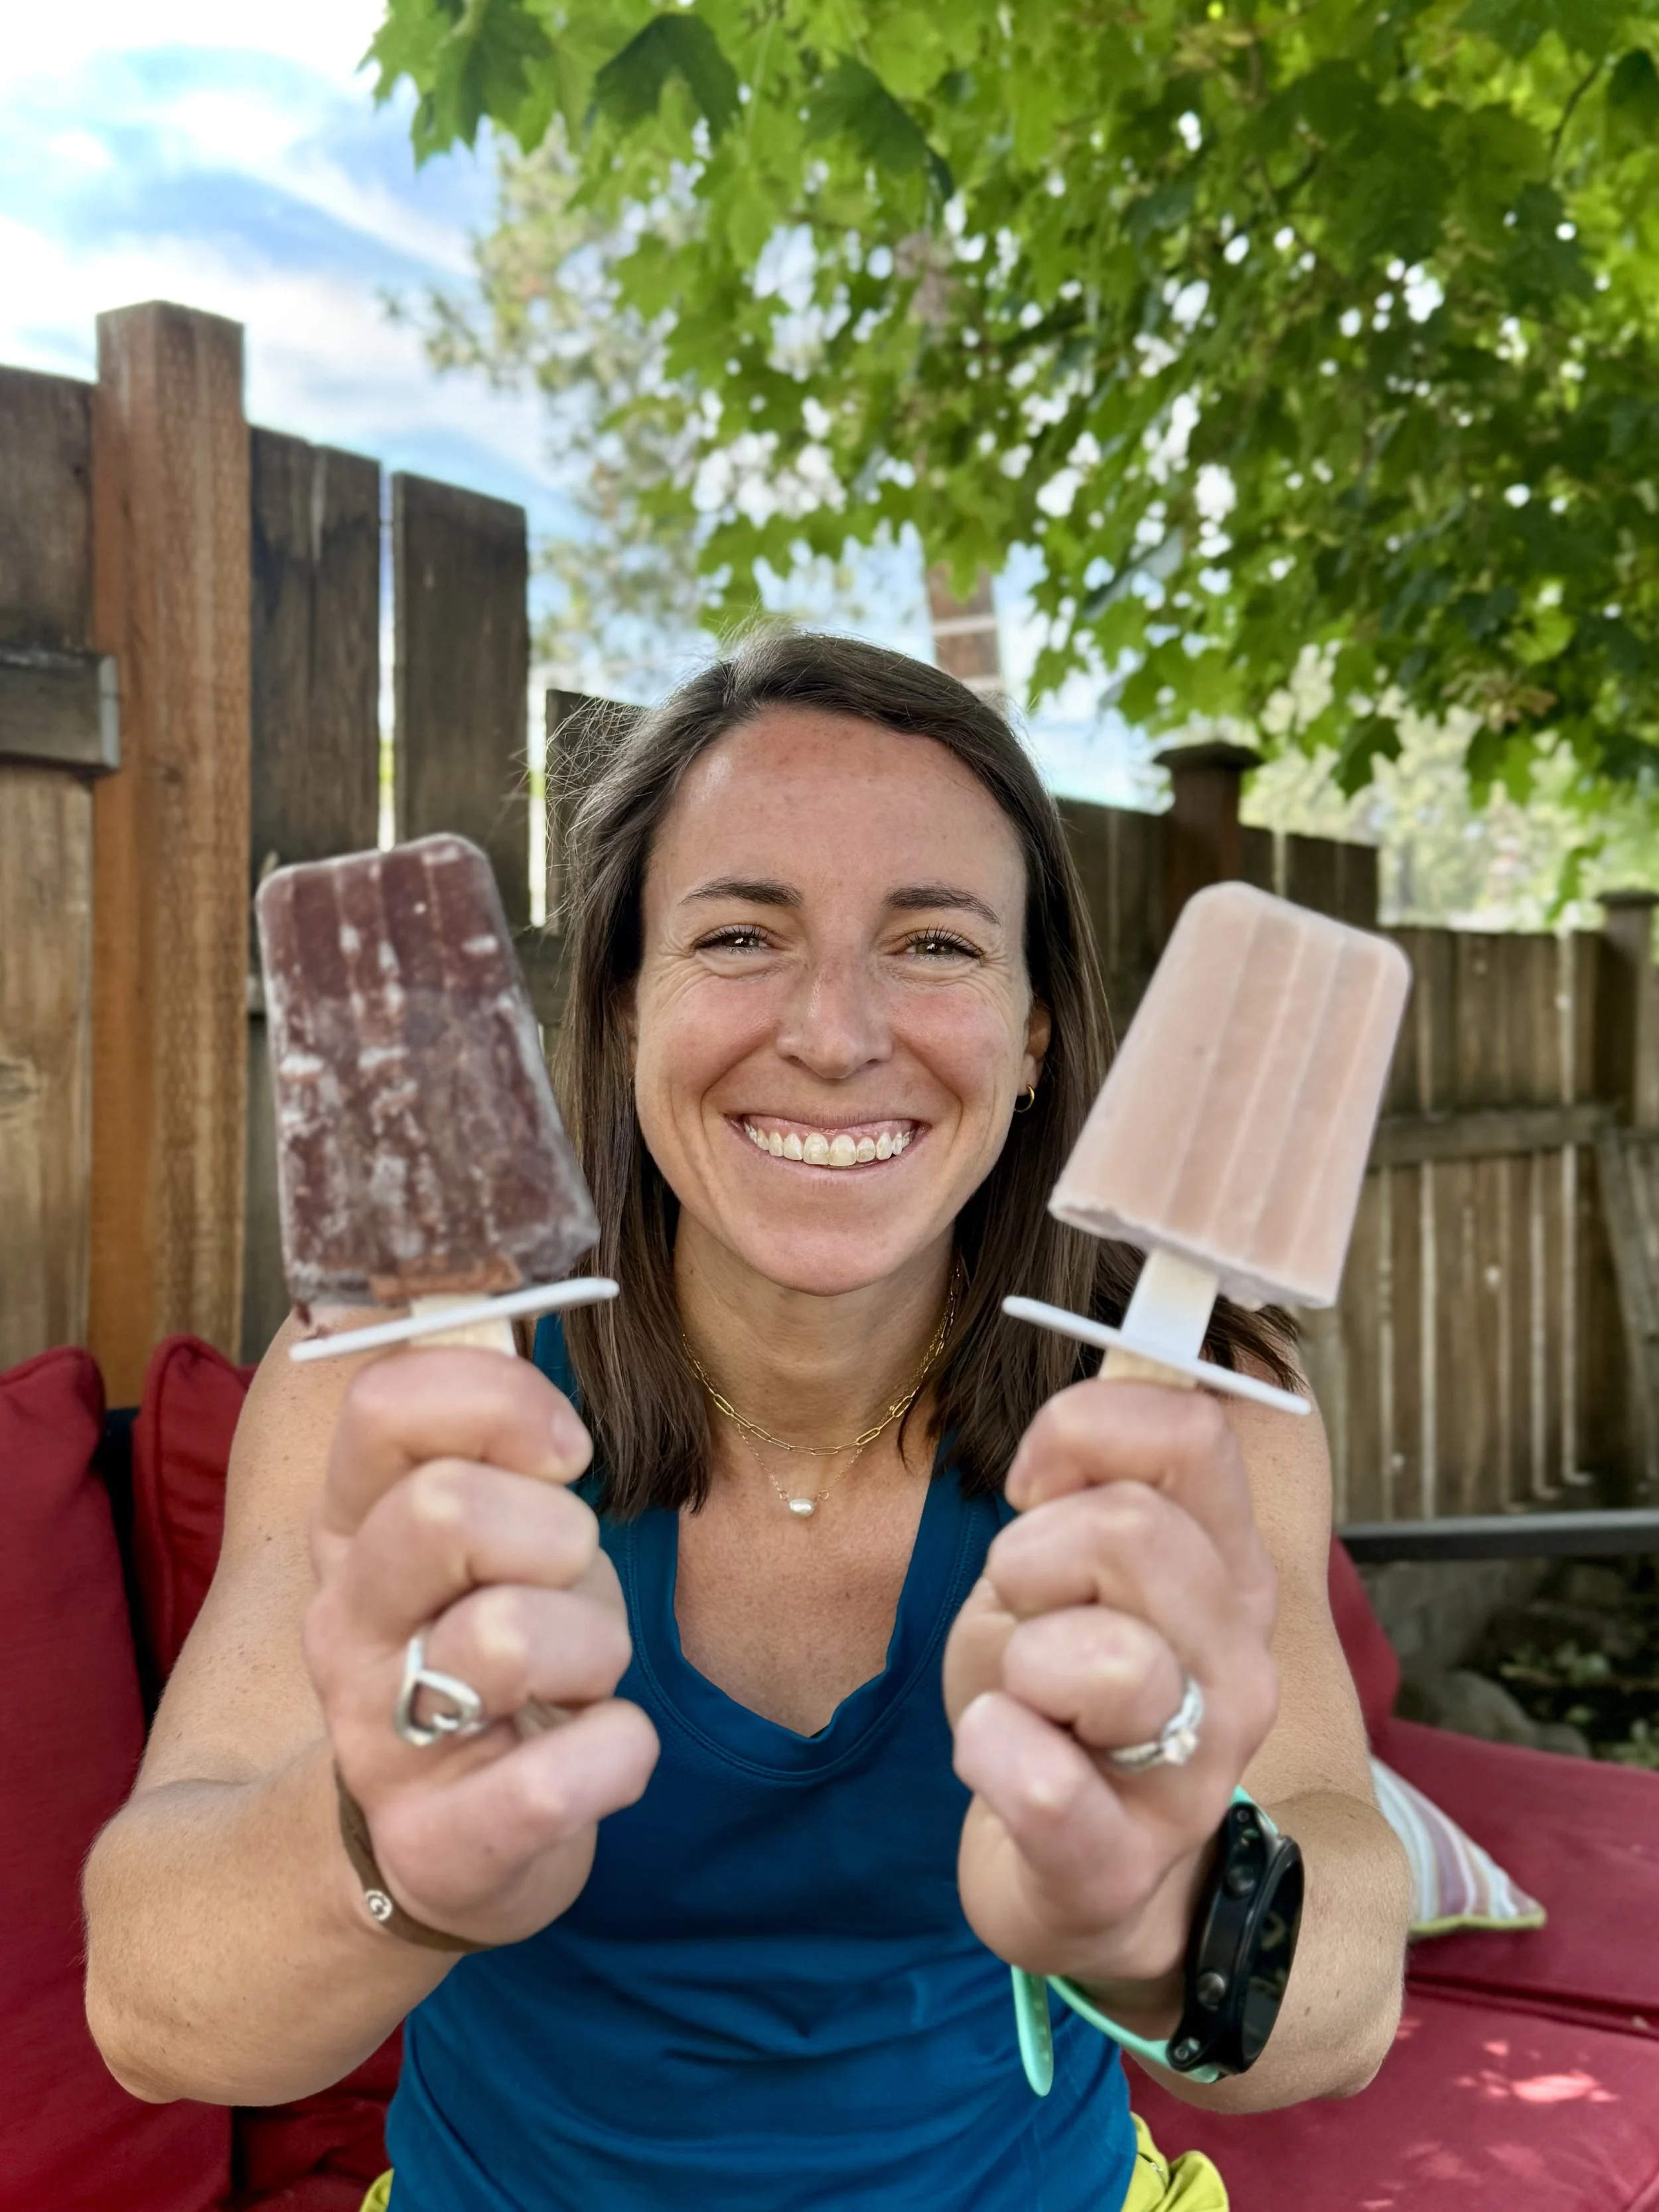
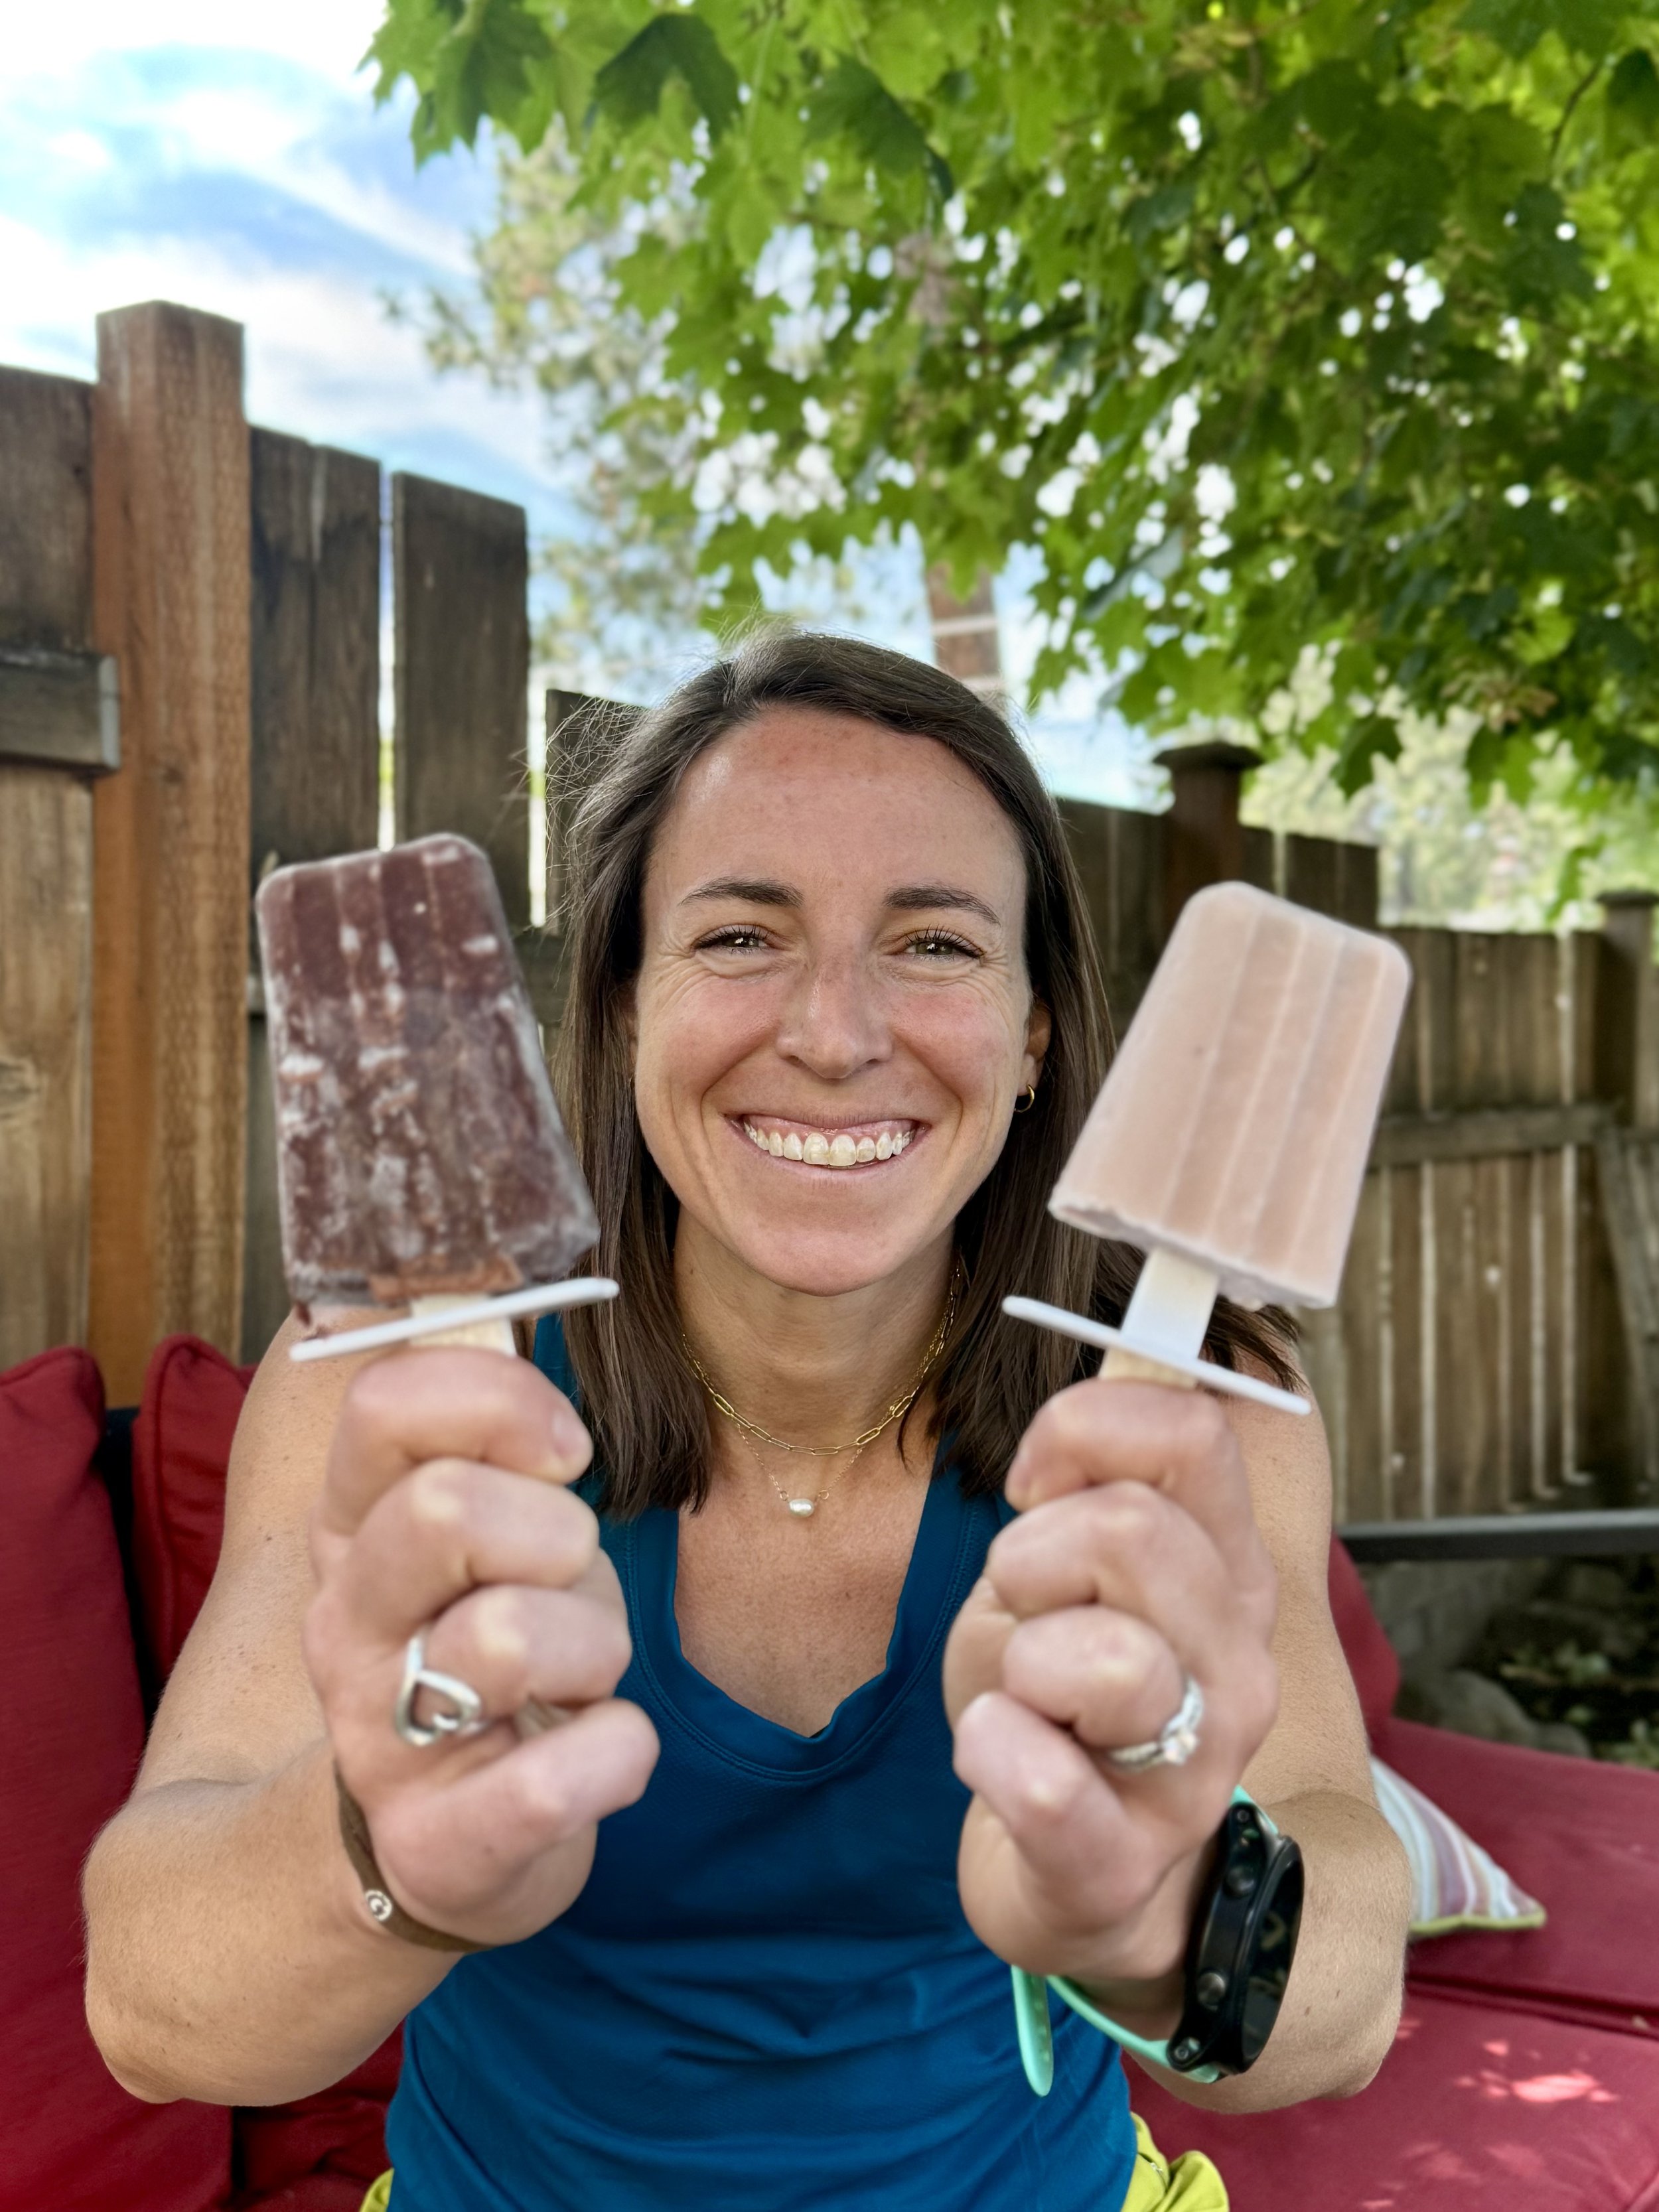
Tart Cherry Popsicles
Ingredients:
2 cups Greek yogurt
3/4 cup milk (or milk alternative)
3/4 cup tart cherry juice
a dash of vanilla extract
1/4 cup dark chocolate chips
How to:
Mix all the ingredients together in a bowl.
Pour into popsicle molds. Fill molds about 3/4 of the way full. Add in popsicle sticks.
Freeze until frozen
Enjoy!
💡 Tip: Tart cherry juice has anti-inflammatory benefits and can help support better sleep — a great bonus for endurance athletes focused on recovery.
Fudgesicle
Ingredients:
2x 11.5 oz bottles of Fairlife Chocolate Milk
1 package of pudding mix
1/4 cup chocolate chips
How to:
Mix all the ingredients together in a bowl.
Pour into popsicle molds. Fill molds about 3/4 of the way full. Add in popsicle sticks.
Freeze until frozen
Enjoy!
These fudgesicles taste indulgent but still offer a good dose of protein for energy and satisfaction.
A Sweet, Balanced Way to Cool Off
Whether you’re fueling up after a long training session or just looking for a nutritious family treat, these popsicles are a simple way to add some balance to your summer. As a dietitian private practice, we love helping clients find creative ways to enjoy food while supporting their goals through customized nutrition plans — from general wellness to nutrition for endurance athletes.
Here’s to staying cool, nourished, and thriving all summer long!
Want More?!
Love simple, balanced recipes like this? You’ll love working with our team! At our dietitian private practice, we create customized nutrition plans to help you fuel your life—whether that’s for everyday wellness or athletic goals.
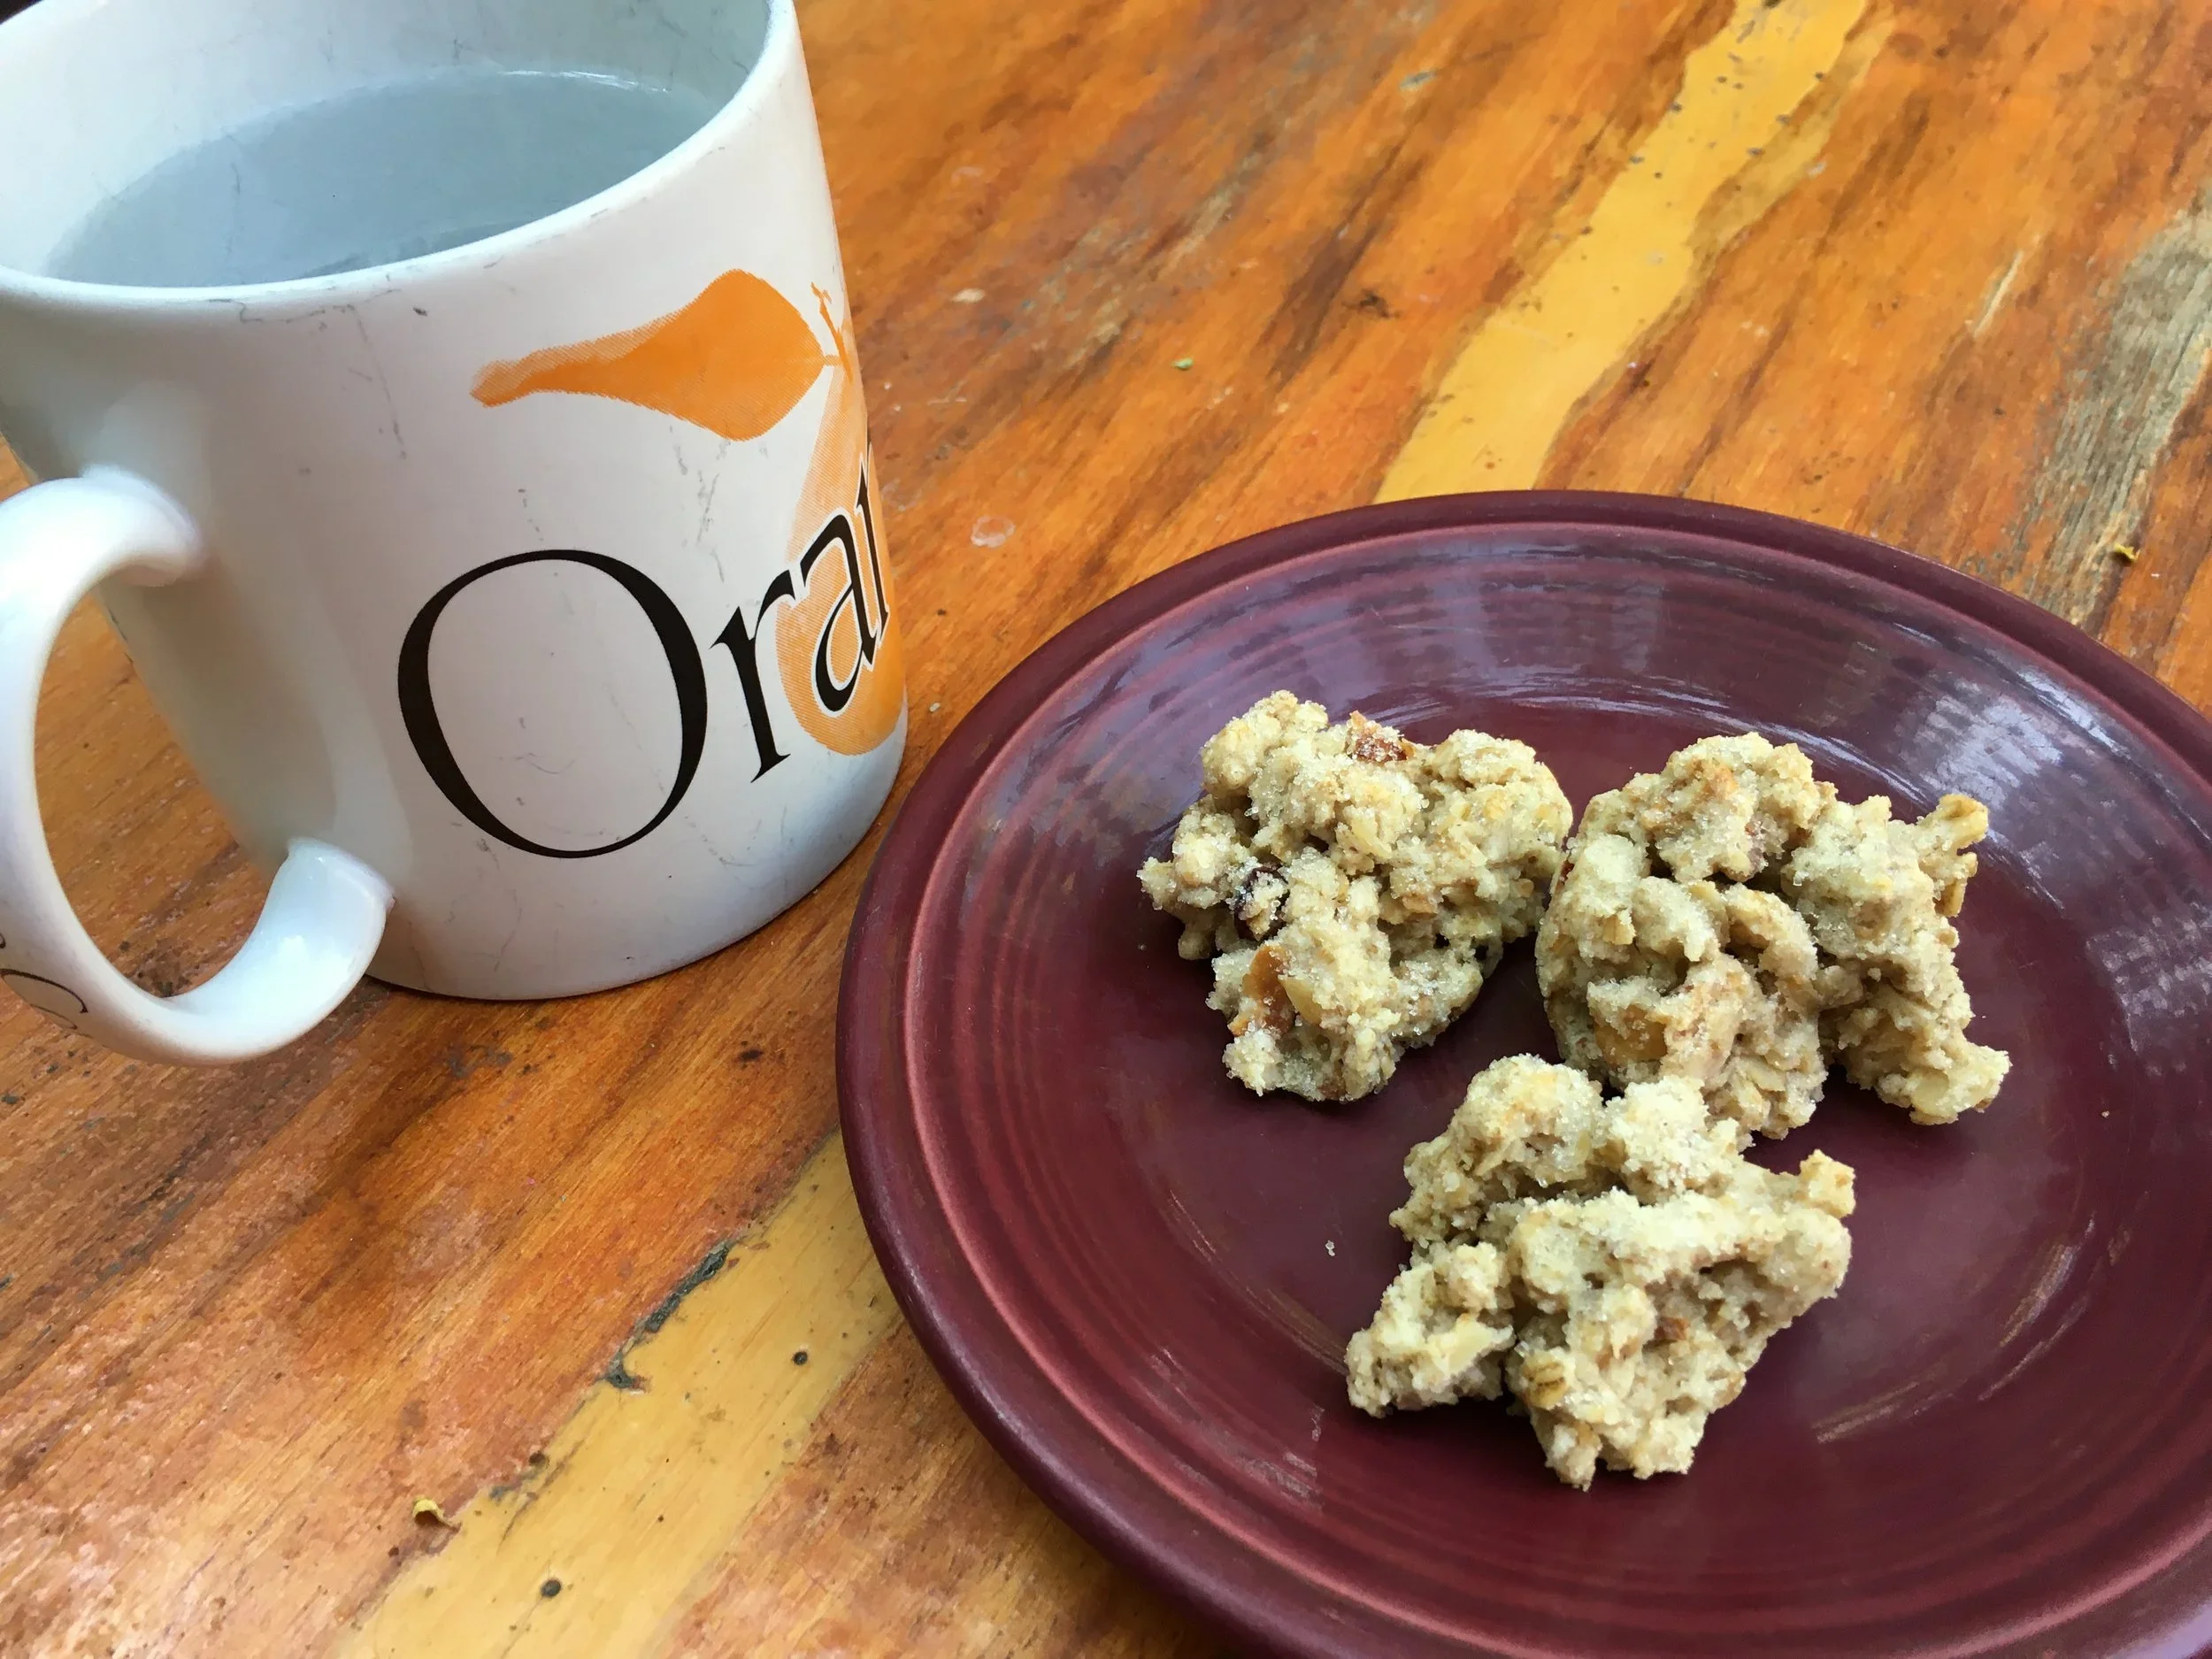
Heart Healthy Cherry Almond Chocolate Scones
Celebrate Heart Health Month and Valentine’s Day with these Heart Healthy Cherry Almond Chocolate Scones. Made with whole wheat flour, oats, canola oil, and antioxidant-rich cherries and chocolate, this recipe supports heart health while satisfying your sweet tooth. Created by a Spokane nutritionist and dietitian specializing in heart-healthy recipes and customized nutrition plans.
ABOUT US: SPOKANE NUTRITIONISTS
We are a group of registered Spokane dietitians and personal trainers who have a passion for helping you feel in control of your health.
We work mainly with athletes, those with chronic GI conditions, and women in perimenopause and menopause. We create customized nutrition plans to empower and educate you in your health journey.
February is Heart Health Month AND Valentines Day so I wanted to share a recipe that would be fun to make for Valentines Day that is also Heart Healthy!!
So, first of all, what makes a food heart healthy?
Generally, it has a high amount of fiber and is low on saturated fats. Of course having other cardio-protective nutrients, like anti-oxidants is great too!!
This recipe has all of those qualities!!
The whole wheat flour and oats add more fiber than if we were to just use only white flour. Remember, whole grains are a great way to get fiber in!!
The oil used is canola oil. I feel like canola oil gets a bad wrap, but if we look at the types of fats that are in canola oil, it is mainly made up of unsaturated fats (poly and mono) compared to saturated fats… which is a good thing for your heart!!
Almonds are also high in unsaturated fats and low in saturated fats. These unsaturated fats can help increase your good cholesterol and decrease your bad cholesterol.
Chocolate and cherries contain antioxidants. Anthocyanins, flavanols and catechins to be exact!! Antioxidants protect our cells which ultimately help keep us healthy!!
So, now for the recipe!!
Heart Healthy Cherry Almond Chocolate Scones

Ingredients:
1 cup white flour
1 cup whole wheat flour
1 1/4 cup oats
1/4 cup sugar
1 TBSP baking powder
1/2 tsp salt
1 egg
1/2 cup milk
1 tsp vanilla extract
1/2 cup canola oil
1/2 cup mix ins (I used almonds, dried cherries and mini chocolate chips)
How To:
Preheat oven to 400F
Combine dry ingredients in a bowl and mix well.
Combine wet ingredients in a bowl and mix well.
Make a well in the dry ingredients and pour the wet ingredients in. Mix until just combined.
Place spoonfuls of batter on a baking sheet (recipe should make 18-24)
Sprinkle to tops with sugar if desired
Bake for 5-7 minutes or until golden brown. Do not over bake!
Enjoy!
This can be made into a balanced snack by adding some protein!! I ate mine alongside greek yogurt mixed with peanut butter and raspberries!!

3 Ingredient Mug Cake
Enjoy a quick and easy 3 ingredient mug cake naturally sweetened with banana. Perfect for busy days, marathon fueling, customized nutrition plans, and menopause-friendly meal planning. Tips from a Spokane nutritionist included.
A Spokane Nutritionist’s Quick and Healthy Treat for Marathon Fueling, Customized Nutrition Plans, and Menopause-Friendly Meal Planning

Sometimes you want a warm, homemade treat but don’t have the time or want leftovers. This 3 Ingredient Mug Cake is perfect for those nights! It’s fast, easy, delicious, and can even fit into your marathon fueling plan or daily meal plan if you’re a nutrition-conscious endurance athlete.
This mug cake is naturally sweetened with banana, making it a simple and wholesome option that supports healthy eating habits recommended by dietitian private practices. It’s also a versatile choice for those navigating nutrition choices during menopause or following a perimenopause meal plan, as it’s easy to prepare and portion-controlled.
Why You’ll Love This Mug Cake
Quick and easy, perfect for busy mornings or nights
Naturally sweetened with banana, supporting balanced blood sugar
Portion-controlled to avoid leftovers
Suitable for endurance athletes as a small energy boost
Works for customized nutrition plans, including perimenopause meal plans and nutrition for menopause
ABOUT US: SPOKANE NUTRITIONISTS
We are a group of registered Spokane dietitians and personal trainers who have a passion for helping you feel in control of your health.
We work mainly with athletes, those with chronic GI conditions, and women in perimenopause and menopause. We create customized nutrition plans to empower and educate you in your health journey.
Tips from a Spokane Nutritionist
Add a pinch of cinnamon or vanilla extract for extra flavor
Top with a dollop of nut butter for additional protein
add some chocolate chips, sprinkles and/or whip cream for added joy!
Enjoy this simple, satisfying treat as part of your daily meal plan, pre-run snack, or anytime you need a quick dessert. A dietitian can also help tailor this recipe to fit your specific nutrition goals, whether you are training for a marathon or focusing on menopause nutrition.
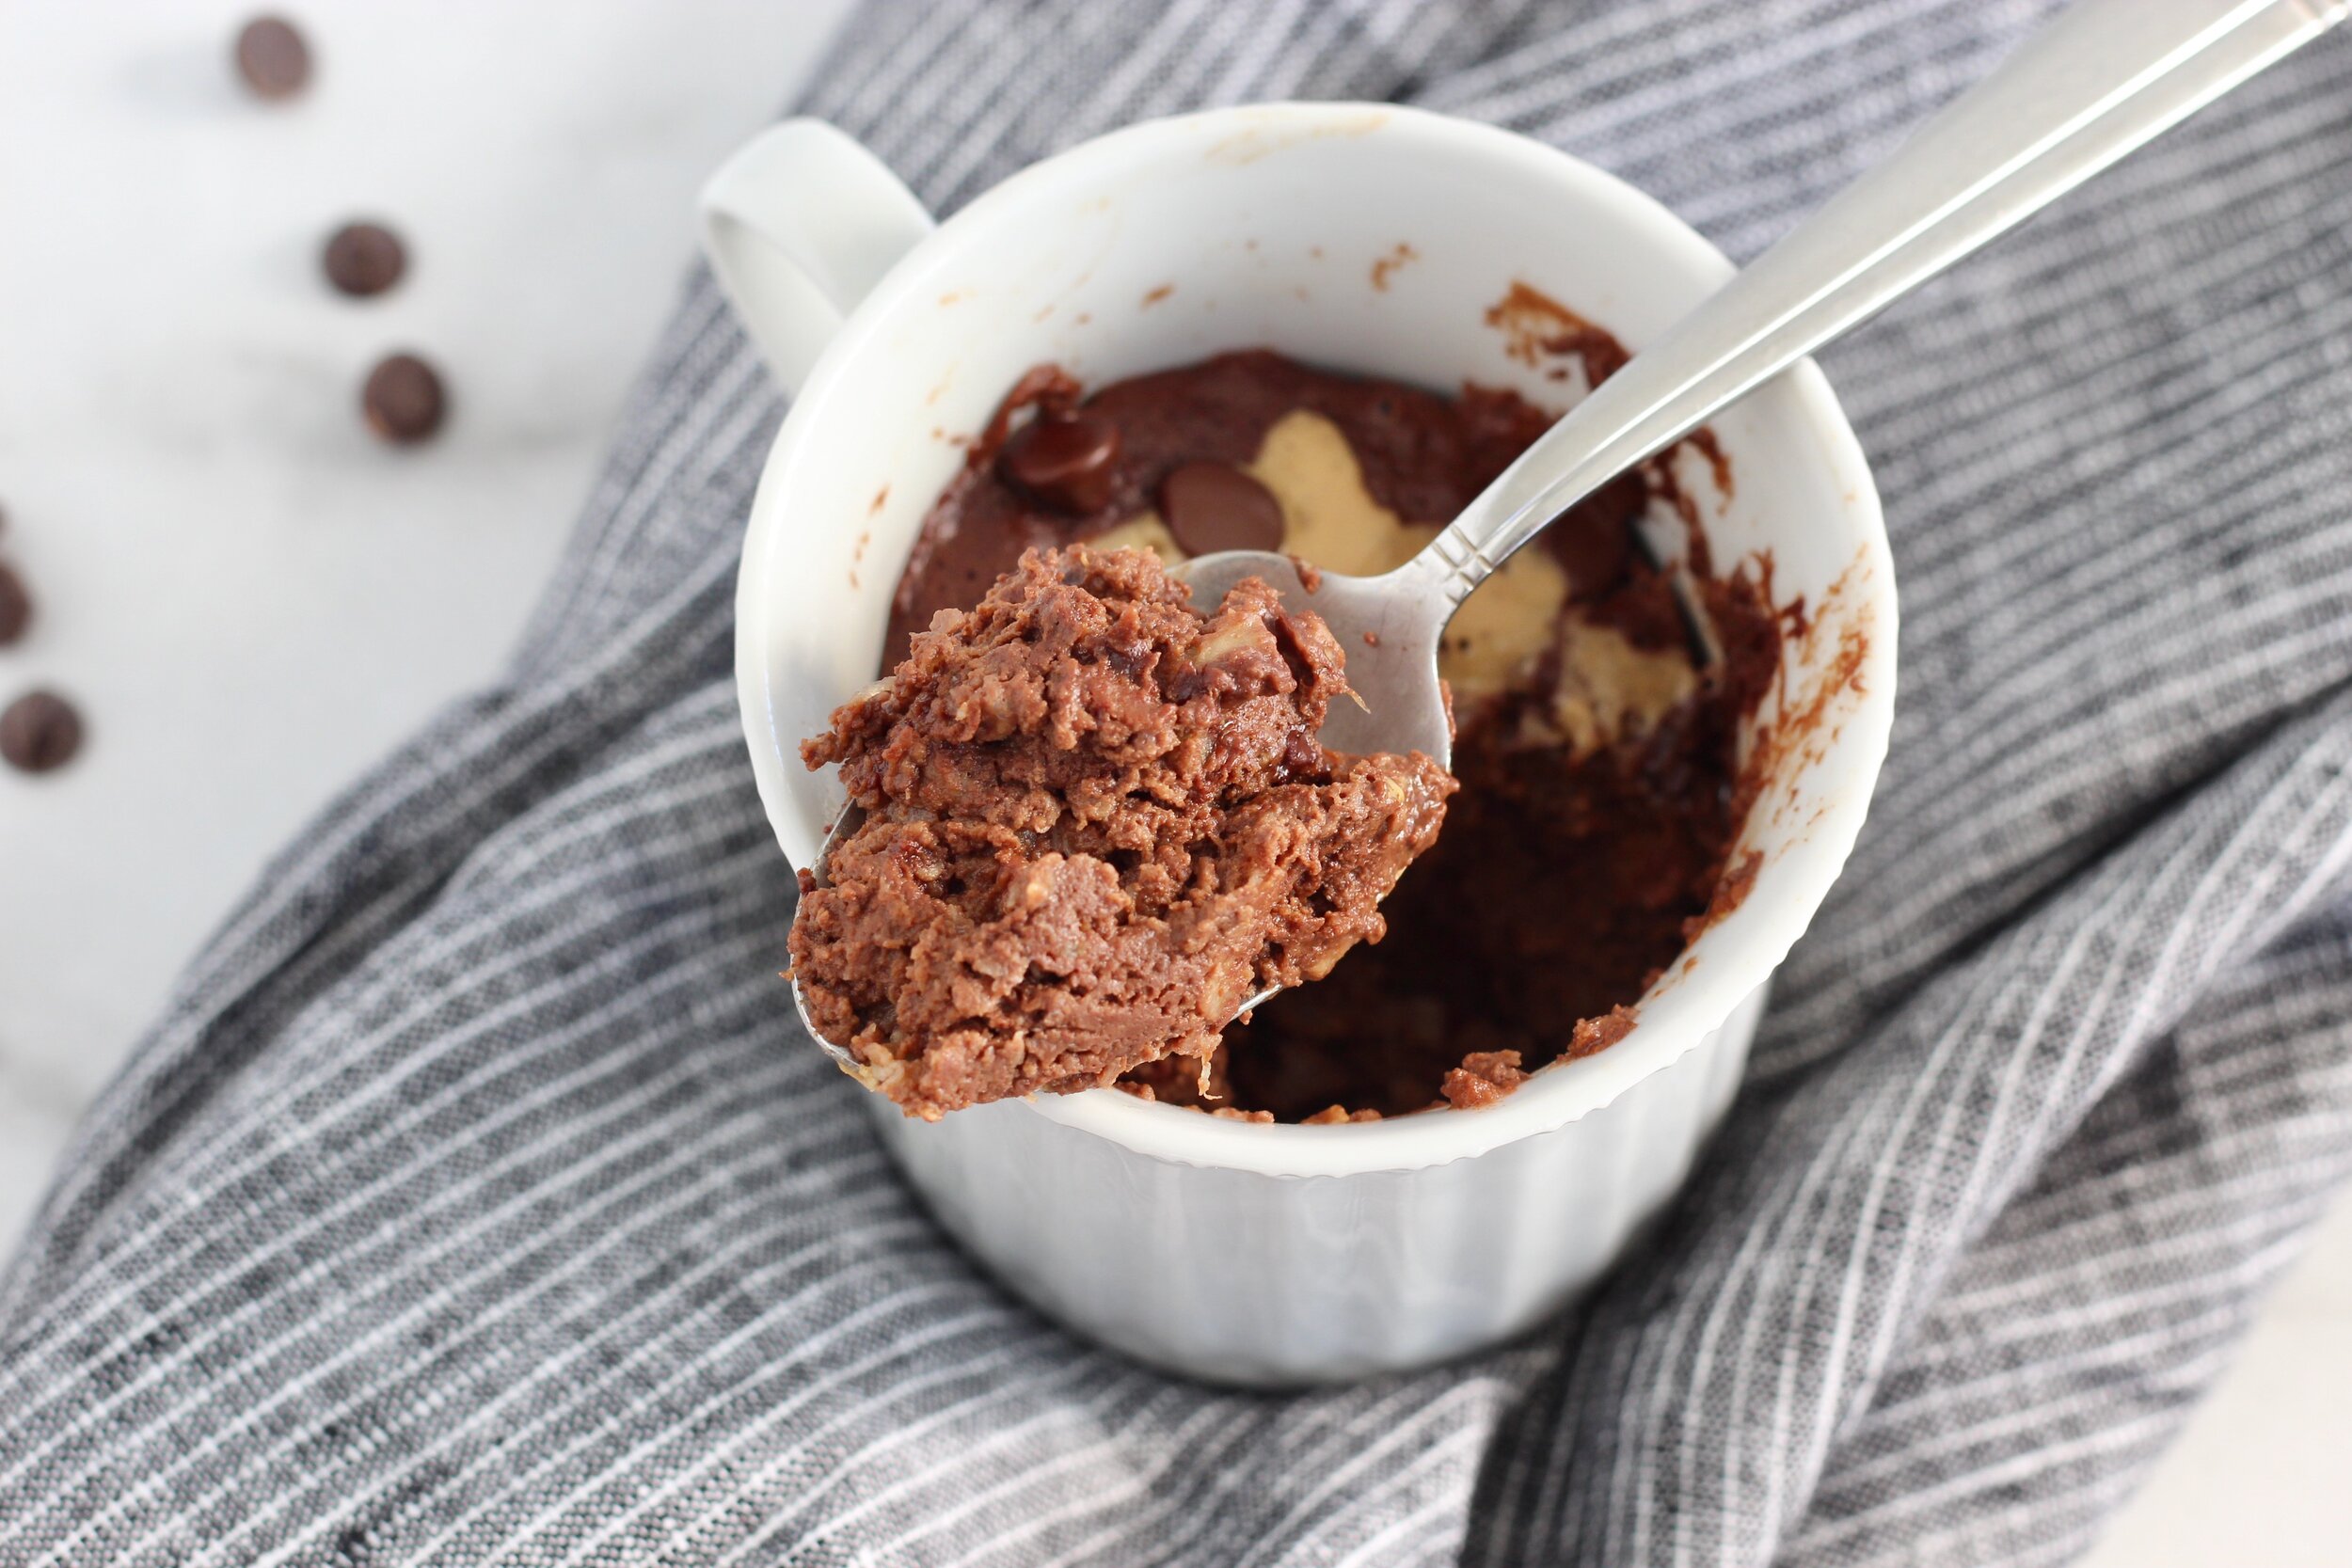
3 Ingredient Mug Cake
Ingredients:
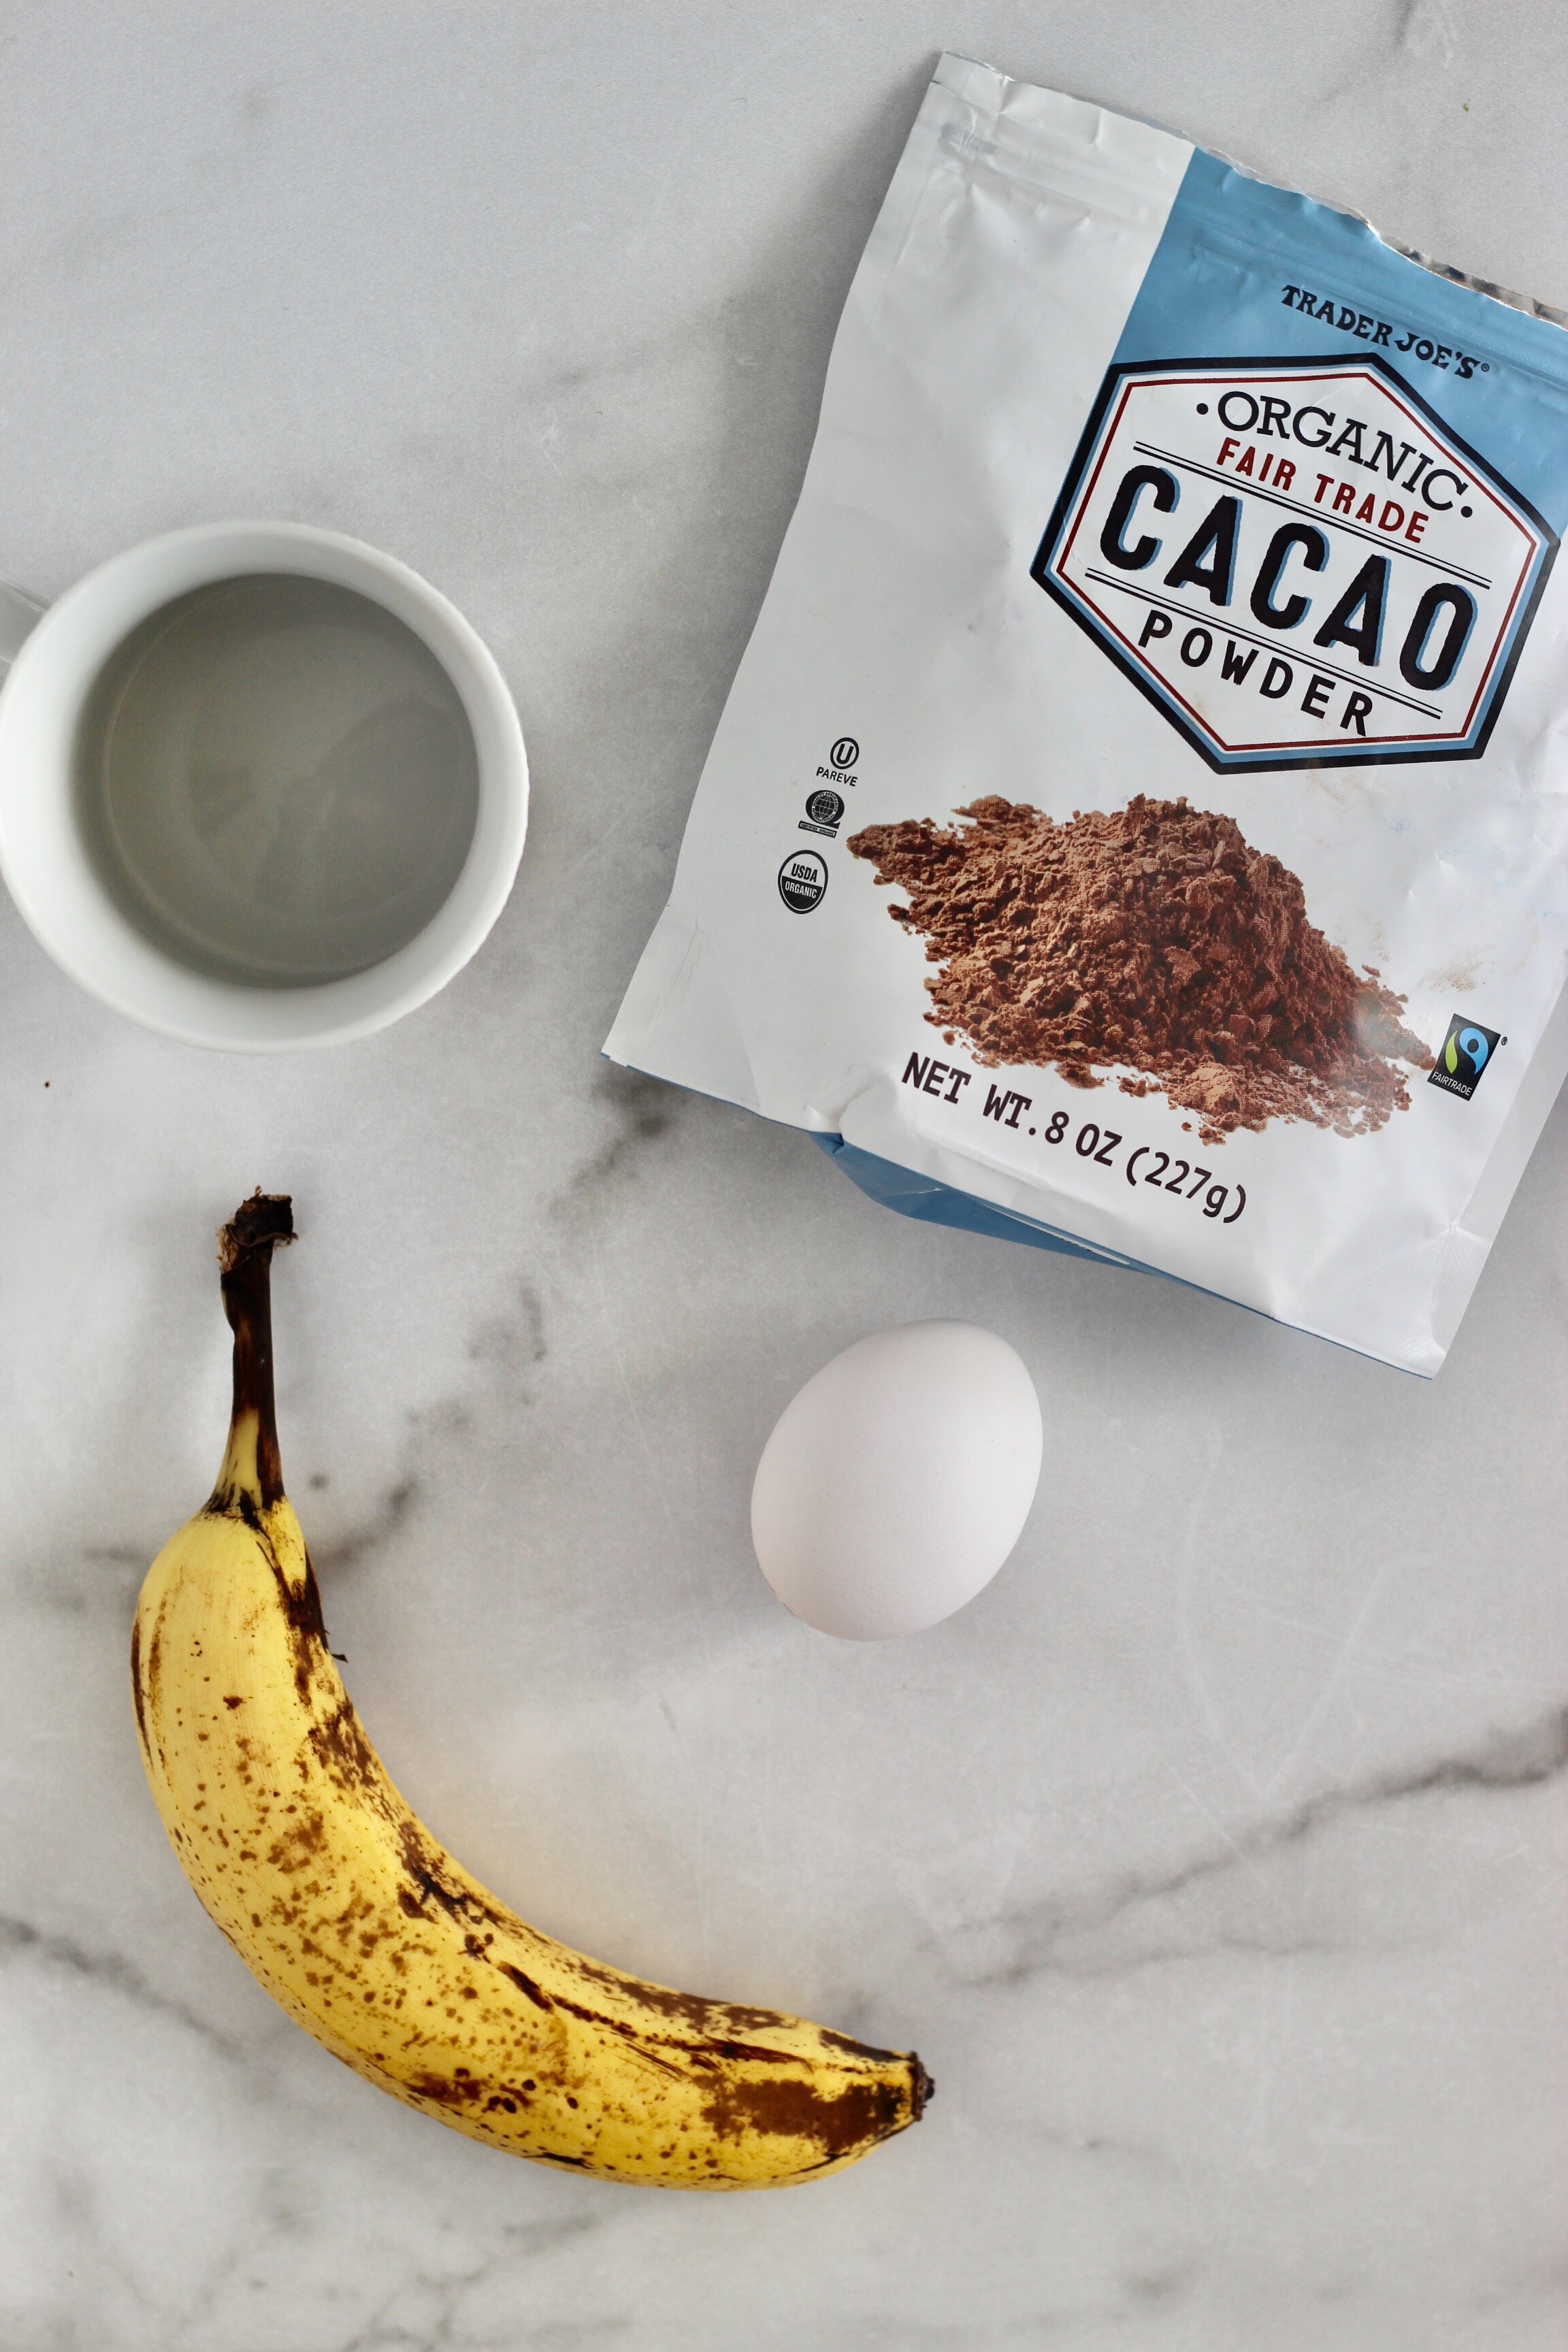
1 small ripe banana
1 egg
2 TBSP unsweetened cocoa powder
How to:
Add banana to a large mug and mash until mostly broken down.
Mix in egg and cocoa powder and stir until everything is fully combined into a batter-like consistency.
Microwave for 60-75 seconds. Batter should look cooked through and have a cakey texture.
Add your favorite toppings!! (Mine are peanut butter and chocolate chips!! But whip cream and sprinkles are fun too!)
*Note: use a large mug because the cake will puff up when it cooks and you don’t want it to spill over!
*Note: the riper the banana, the sweeter the cake!
Nutrition information: Calories: 185, Carbs: 29g, Fat: 6g, Protein: 9g
I hope you enjoy this as much as I do!!
Monster Granola Bars

YUMMMMM! These were fun to make and even better to eat!!! I actually bit into these and thought to myself, these could be a dessert… thats how good they are!! Plus, if you are like me a love to bake, it is a good way to get your baking fix in!
The nutrient breakdown of these make them a great pre-workout snack because of the quick and slow carbs. They also have some fat and a bit of protein which will help the energy last longer.
If you are wanting to utilize them as an everyday snack, pair with a piece of fruit and a hard boiled egg and it will be a well balanced snack that will provide great lasting energy!
Monster Granola Bars
Ingredients:
1/2 cup peanut butter
1/4 cup honey
1/8 cup avocado oil (or melted coconut oil)
3/8 cup unsweetened applesauce
1/2 cup whole wheat flour
1 tsp vanilla
1/2 tsp baking soda
2 cups oats
1/2 cup dark chocolate chips
1/4 cup raisins
How to:
Preheat oven to 350F. Line an 8x8 pan with parchment paper.
Combine peanut butter, honey, oil, applesauce and vanilla in a medium bowl. Mix well.
Add the flour, baking soda, oat. Mix to combine.
Mix in chocolate chips and raisins
Transfer to the 8x8 pan and press down so it is evenly distributed.
Bake for 18-20 minutes, or until golden brown. Let cool before you take it out of the pan.
Remove from the pan and cut into equal portions.
If you will be eating right away, store in refrigerator. If you will be storing them for snacks to grab over the next couple of months, wrap each individually in foil and stir in the freezer.
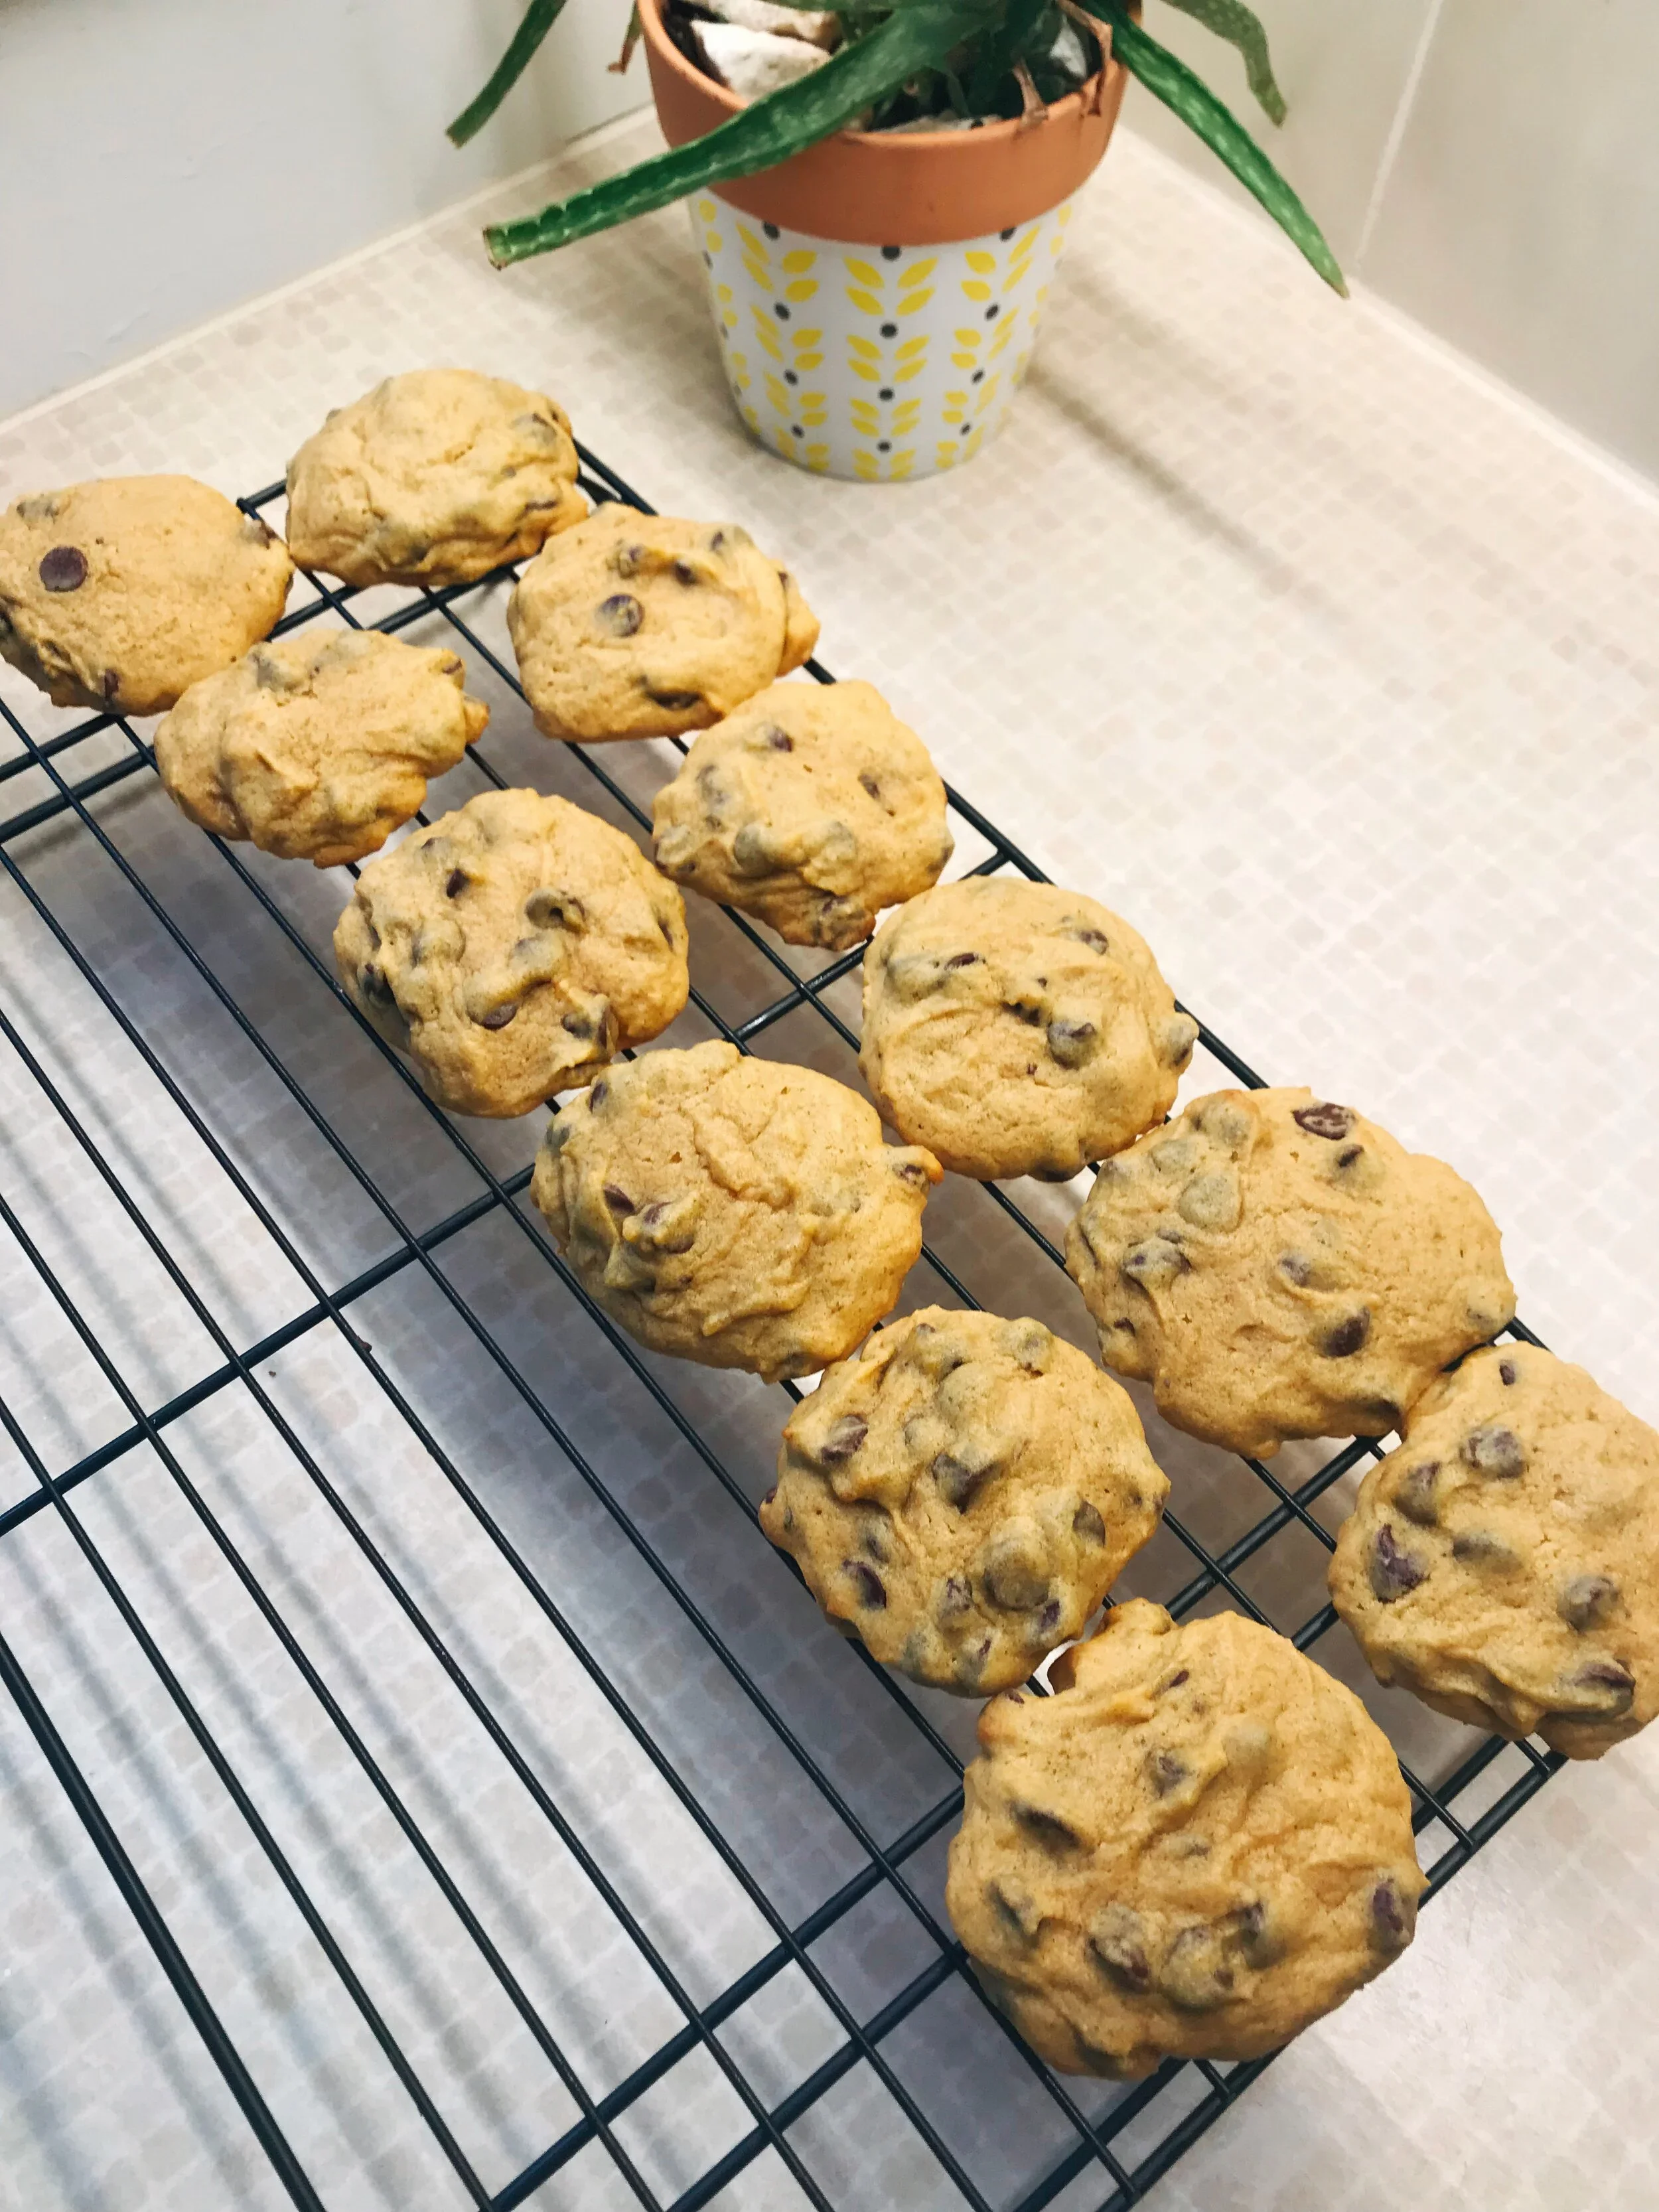
The BEST Pumpkin Cookies
It is not often that I find a dessert recipe that I like so much that I will make it again and again. I am usually always on the hunt for “the best ____” and let me tell you, these ARE the best pumpkin chocolate chip cookies!

Here is the recipe:
Pumpkin Chocolate Chip Cookies
Ingredients:
3 cups all purpose flour
3/4 tsp salt
1/2 tsp baking soda
1/2 tsp baking powder
1 tsp cinnamon
1/2 tsp nutmeg
1/2 tsp ginger
1/4 tsp cloves
1 cup butter, at room temperature
3/4 cup brown sugar
1 cup sugar
1 egg, at room temperature
2 tsp vanilla extract
1 cup pumpkin puree (not pumpkin pie filling)
2 cups chocolate chips
How to:
Preheat oven to 350F. Line baking sheets with Silpat or parchment paper
In a medium bowl, whisk flour, baking powder, baking soda, and spices.
Using a mixer, cream the butter, brown sugar and sugar. You want to beat it until it turns light in color and a little fluffy, usually 4+ minutes.
Then add vanilla, pumpkin puree, and egg. Mix to combine.
Add the flour mixture in 2-3 batches. Mix after each.
Add chocolate chips and stir until combined.
Using a large spoon, scoop a heaping spoonful and place it on the baking sheet. They won’t spread much when you bake them, so you can fit them fairly close (I was able to do 12 per pan).
Cook for 10-12 minutes or until outsides slightly brown. You want to pull them early-ish so they keep their softness!
Repeat until all cookies are cooked. Cool on rack and store in an airtight container.
Enjoy :-)
Expect to make 32-36 cookies.